Why might you want to do this?

To record additional information whenever a check in happens.  For example to confirm the check in confirms to a security policy or usability policy.


To make the change

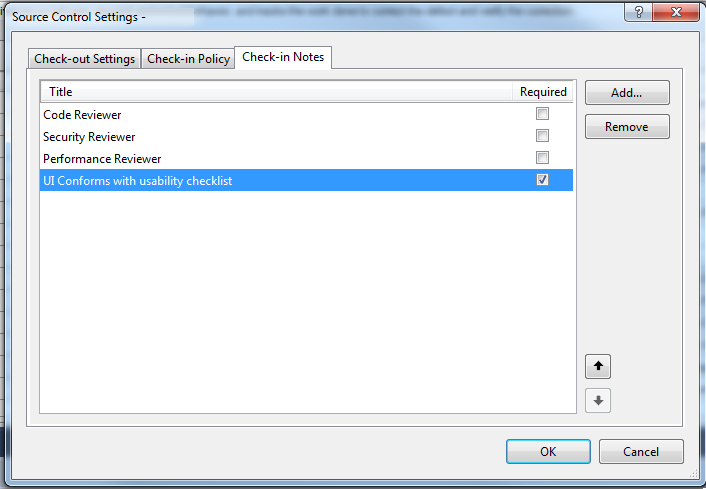
In Team Explorer, Right Click the project, Team Project Settings, Source Control.

The Check In Notes allows you to specify as many notes as required (Although for the sake of the developers I’d recommend not going crazy here!).

Migrating from Linux Plesk to

Migrating from a Linux Plesk Server running QMAIL to a Windows Plesk server running HMailserver.

Plesk migration just didnt seem to want to work for me.

hmailserver is a Windows IMAP / SMTP / POP3 server that integrates well with Plesk.

Edit April 2012:

Plesk does not support HMailServer 5.  Rather than Plesk, I now reccomend Website Panel which integrates well with hMailServer 5.


I managed to migrate email manually by recreating the accounts on the new server then using IMAP Size to copy the Imap folders.

(Granted this will only work if you only have a small number of accounts).

In order to get a list of passwords out of Plesk I used the query below:

(make sure you’re logged in as root)

Select mail.mail_name,domains.name, mail.postbox, mail.redirect, mail.redir_addr, mail.spamfilter, CAST(accounts.password AS CHAR) from mail
left join domains on domains.id = mail.dom_id
LEFT JOIN accounts ON mail.account_id = accounts.id
GROUP BY domains.name

We cast accounts.Password to text so that the raw blob data is shown. This gave me a list of accounts to create.

Using IMAP Size it was then just a matter of backing up each account then restoring it to the new server.

Had a problm with ASP.NET applications generating an Access Denied exception when trying access system.servicemodel.

Turns out this is a problem with Plesk on Windows, and fortunately has a simple fix.

Log in as Administrator and execute the following:

cacls C:\Windows\assembly\GAC_MSIL /E /R psacln /T /C
cacls C:\Windows\assembly\GAC_MSIL /E /R psaadm /T /C
This came from this KB article and fixed the problem for me anyway.

http://kb.parallels.com/8576

C# Pop3

A Free C# library for connecting to and retrieving

email from a POP3 Mail server.

POP3 Mailservers are probably the most common type of mail server used by ISP’s.

This free mail server client allows developers to retieve email from any mail server the user has access to. The Client currently provides the following functionality:

  • Retrieve      Messages (With Attachments), in full from a Mail Server.
  • Retrieve      Messages as a queryable object (Without Attachments) from a Mail Server.
  • Delete      Messages from a Mail Server.
  • Retrieve      Headers as queryable objects from a Mail Server.

Please note that the free version is still in development. I’d be grateful for any bugs, but i can make no guarentees as to when they may be fixed. Please contact the author if you are interested in a version which is not time limited. POP3 Client Examples:

1.) Connect to a POP3 Server and get the number of messages on   the server
Spartan.Net.Mail.POP3 pop3   = new Spartan.Net.Mail.POP3();

pop3.Connect(“YOUR.POP3.HERE”, 110,   “user”, “password”);
int newMessages = 0;

int readMessages = 0;

pop3.ListMessages(out   readMessages, out newMessages);

pop3.Disconnect();


2.) Connect to a POP3 and Retrieve each message as a string
Spartan.Net.Mail.POP3 pop3   = new Spartan.Net.Mail.POP3();

pop3.Connect(“YOUR.POP3.HERE”,   110, “USER”, “PASSWORD”);

int   newMessages = 0;

int   readMessages = 0;

pop3.ListMessages(out   readMessages, out newMessages);

for (int i =   1; i <= newMessages; i++)

{

string   message = “”;

pop3.RetrieveMessage(i,   out message);

}

pop3.Disconnect();

Download the Library from here

Please note that all code and examples are provided “as is”, without any kind of warranty or guarentee as to their purpose.

Using SQLite with C#

Ive created a .NET Wrapper around SQLite which can be downloaded from Here


The example creates an example Server which allows clients to connect to it and execute queries.

This is proof of concept code only – It doesnt install as a windows service.


Extract the contents of the zip file to a folder. Run SQLiteDemoServer.exe Now run the following command: .

telnet localhost 1235 This will start a telnet session to the sqite server.

SQL can be sent as plain text. a ; followed by newline causes the sql to be evaluated. Special Commands show databases; -Lists all of the databases on the server use -Connects to .

Download the Library from Here

Please note that all code and examples are provided “as is”, without any kind of warranty.

Setting up thunderbird for S/MIME

Prerequisites:

A P12 File Containing a suitable key and certificate for Signing and Encryption

The Certificate Authority Certificate (Usually a .crt file)

Certificates for each person you wish to send secure email to. (Usually .crt files)

1. Open Advanced properties in thunderbird

On the tools menu, select options. Click Advanced on the dialog that appears, then click the manage certificates button.


2. Import the CA Certificate

Click the Authorities Tab, Select import. Browse to your certificate authority certificate and import it.

Ensure that the certificate is to be trusted for all purposes as below, then click OK.


3. Import Your Certifcate

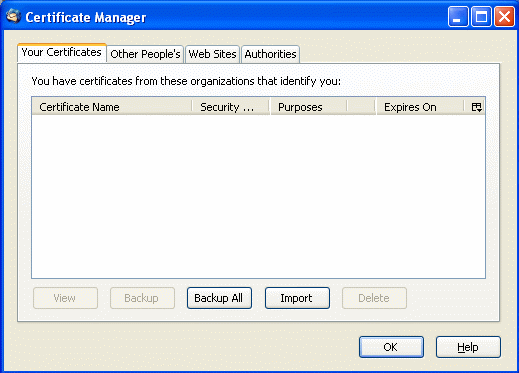
Click the “Your Certificates Tab”. Click the import button and browse to your certificate.

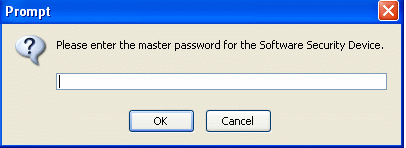
If asked for a password as below, this is the password you have assigned to thunderbird to protect your certificates.
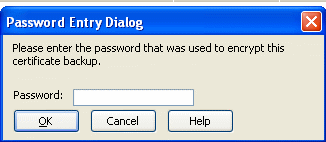
When prompted, enter the password that was used to protect the your certificate file as below.
 

4.    Import Other Peoples Certificates.

For each person you intend to communicate with securely add their personal certifcate, by clicking the “Other People’s” Tab, and clicking import, browese to the certificate and select OK.
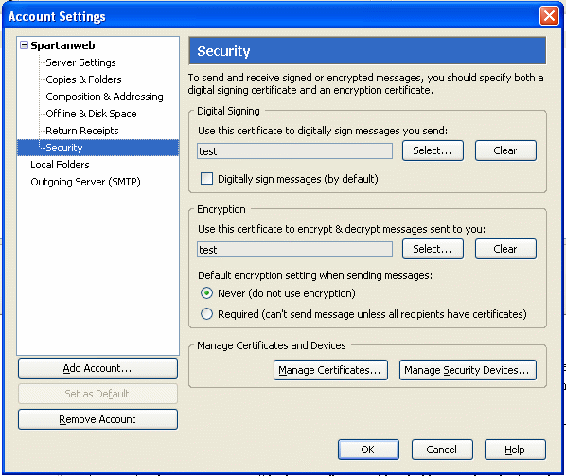
Click OK to close both dialog boxes to return to the main thunderbird window.
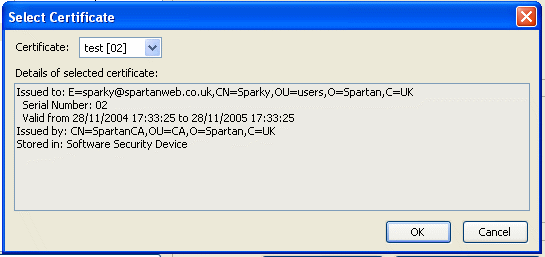
When asked if your wish to use the same cert for encryption select yes.


5.  Thunderbird is now setup for S MIME.


PHP Hit Counters

Below are two very simple examples of creating a Hit Counter.

This simply increments each time a user visits a site.  This is the first “Server Side” code I ever wrote, albeit in perl at th


1. The Text Counter

Page Hit counters may be easily created for your web pages. A text counter is the simplest method of counting visitors to a page. Such a counter is easily created using PHP. The Hit counter looks like this: 373 (Click Refresh on your browser to watch it increase)

For this to work your .htm or .html file must be changed to have the extension .php You should also have a text file called count.txt which contains nothing but the count (No line breaks etc) e.g.e.g. 000001

At the point on the page where you wish the counter to be placed, enter the following code:

1.) Text Counter using PHP
<?php$id = ‘count.txt’;                         // File Which stores the count

$fp = fopen($id,”r”);

$count = fgets($fp, 4096);                 // Get a number from the file

fclose($fp);

$count++;                                  // Increment it

$fp = fopen($id,”w”);                      // Put it back into the file

fwrite($fp, “$count”, 4096);

fclose($fp);

print $count;

?>

The count.txt file should be readable and writable by all. e.g. CHMOD 666. If using CuteFTP, this is acomplished by right clicking the uploaded file, and choosing chmod. All rows of the first TWO columns should by checked in the popup box that appears. Now simple upload your php file and watch the counter go.

2. The Graphical Counter

In order for this to work, your ISP must have installed the GD library for GIF Images. This uses a modification of the above script to create a graphical counter. It is advisable to be familiar with how the above script works before attempting this script.

The following are required: A Suitable background Image (must be a .gif). A text file for holding the counA text file for holding the count as with the text counter.

The following code inserted into a file called count.php

2.) Graphical Hit Counter using PHP.
<?php$id = ‘count.txt’;                           // File Which stores the count

$fp = fopen($id,”r”);

$count = fgets($fp, 4096);                   // Get a number from the file

fclose($fp);

$count++;                                    // Increment it

$fp = fopen($id,”w”);                        // Put it back into the file

fwrite($fp, “$count”, 4096);

fclose($fp);

Header(“Content-type: image/gif”);           // Tell the Browser we’re sending a gif

$im = imagecreatefromgif(“count.gif”);       // Load the background gif file

$black = ImageColorAllocate($im, 0, 0, 0);   // We want black text

$px = (imagesx($im)-7.5*strlen($count))/2;   // Center the count

ImageString($im,3,$px,9,$string,$black);     // Write the text

ImageGif($im);                               // Send it to their browser

ImageDestroy($im);                           // Delete the temporary file

?>

The counter may then be called from a standard image tag such as:

<img src=”count.php”>

Please note that all code examples are provided “as is”, without any kind of warranty.